이번 연구실 프로젝트로 우리는 Automl 을 위한 LLM 구축 프로젝트를 맡았다.
총 두 가지 방식으로 코드를 위한 LLM 구축을 맡았는데
- RAG
- LLM Fine tuning
이렇게 두 가지 프로젝트를 할당 받았다.
그중 RAG는 수아누나가 담당했고, 나는 LLM을 fine tuning 시켜서 csv 파일을 LLM 프롬프트에 입력만 하면, 자동적으로 모델을 추천하고 분석 결과를 Table 형태로 반환하는 LLM을 제작해야 했다.
프로젝트를 진행 중 가장 큰 문제는 내가 LLM을 하나도 모른다는 것이었다. Hugging face도 제대로 못쓰는 나인데 어떻게 문제를 해결했을까?
*특히 구글링과 GPT한테 물어도 이런 Data analysis 를 위한 LLM을 구축한 글은 없어서 idea 찾는 것이 가장 힘들었다.
목차
- Hugging face 에서 모델 양자화 후 업로드 (fine tuning 을 진행할 수 있게 하기 위해)
- 학습을 위한 JSON data set 구축 (multi modal 방법론에서 아이디어 따오기)
- 실험 진행
Hugging face - Llama-3.2-3B load
진짜 부끄럽지만, 나는 이 프로젝트 시작전 hugging face access 받는 것도 몰랐고 token 받는 것 아무것도 몰랐음..
열심히 구글링 줍줍 해서 모델을 불러봤다. 이번 Hugging Face에서 모델을 부르면서 가장 핵심이라고 생각했던 방법은 양자화였다.
- 실험 1: 양자화 모를때 단순 모델 업로드
연구실 서버 gpu와 용량에 맞게 우리는 모델의 총 할당량이 1b도 안되는 모델을 불러왔어야 했다..
따라서 가장 경량화 된 모델을 불러봤는데
프롬프트 질문: '회귀나 분류 모형에 대해 들어본적 있어?'
LLM 답변 : 'I'm not sure ~ '
전혀 알아듣지 못하는 모습을 볼 수 있었음
- 실험 2: 양자화 후 문제점 보안

너무 안좋은 LLM 모델을 사용했다고 판단 함.
따라서 코드를 잘학습 할 수 있는 LLM 이 필요하다고 고안을 했고 Size가 작으면서, 코드에 특화된 LLM 을 부를려고 함.
사용할 양자화는 4Bit 양자화 -> 코드를 위한 Yi-coder를 불러서 적용해보았지만, 성능이 너무 안좋았음
- 실험 3: 24.10 월에 출시한 llama 경량화 모델 사용
import torch
from transformers import AutoTokenizer, AutoModelForCausalLM, BitsAndBytesConfig

# CUDA 장치 확인
device = torch.device("cuda" if torch.cuda.is_available() else "cpu")
print(f"Using device: {device}")

# BitsAndBytesConfig 설정
bnb_config = BitsAndBytesConfig(
    load_in_4bit=True,
    bnb_4bit_use_double_quant=True,
    bnb_4bit_quant_type="nf4",
    bnb_4bit_compute_dtype=torch.bfloat16
)

# 모델 로드 및 GPU로 이동
model_id = "meta-llama/Llama-3.2-3B"
model = AutoModelForCausalLM.from_pretrained(model_id, quantization_config=bnb_config, device_map={"": 0}).to(device)

# 토크나이저 로드
tokenizer = AutoTokenizer.from_pretrained(model_id, add_eos_token=True)
토큰을 할당 받은 후 -> 모델 양자화 시켜서 업로드
프롬프트에 질문 : 'Pycaret setup 모듈을 어떻게 쓰는지 서술해라'
def ask_question(prompt):
    """
    주어진 프롬프트에 대한 답변을 생성하는 함수.
    """
    # 텍스트를 텐서로 변환하고 모델의 장치로 텐서를 이동
    inputs = tokenizer(prompt, return_tensors="pt").to(device)

    # 모델을 사용하여 출력 생성
    outputs = model.generate(**inputs, max_length=1000, num_return_sequences=1, repetition_penalty=1.2)

    # 출력 텍스트로 디코딩
    response = tokenizer.decode(outputs[0], skip_special_tokens=True)
    return response

# 사용자 프롬프트 입력
user_prompt = "Explain how to use PyCaret's setup function in AutoML."
response = ask_question(user_prompt)

# 답변 출력
print("User Prompt:", user_prompt)
print("LLM Response:", response)
질문과 답변: 잘 설명하는 것 확인
User Prompt: Explain how to use PyCaret's setup function in AutoML.
LLM Response: Explain how to use PyCaret's setup function in AutoML. This is a part of the Python Tutorial for Beginners.
In this tutorial, you will learn about what is an AI model and why it’s important? You’ll also get familiar with different types of machine learning models used today by top companies around the world like Google, Facebook etc.. We hope that after reading through all these points related specifically towards artificial intelligence (AI), then one could easily understand its significance within any organization looking forward into making better decisions regarding their operations & investments made so far!
The term ‘artificial Intelligence’ was first coined by John McCarthy who published his paper titled “Programs With Common Sense” on April 14th, 1956 during symposium organized at Dartmouth College where he presented ideas such as robot navigation system which would be able to sense objects nearby while walking autonomously without crashing into them! The concept behind building intelligent machines has been there since ancient times but only recently did we start developing software capable enough to mimic human behavior when performing specific tasks under given circumstances i.e., if-then statements
How do I train my own data set using Pycaret?
Pycaret provides users with easy access to advanced Machine Learning algorithms including: XGBoost, Random Forest Classifier, Gradient Boosting Tree Classifier, K Nearest Neighbor Algorithm(Sklearn). These are some common classification problems solved via supervised training sets; however they can help predict future outcomes based upon past events recorded throughout history – thus allowing organizations across industries make more informed business decisions than ever before possible thanks largely due our ability develop highly sophisticated systems designed specifically meet unique needs each company may face going forwards…
If your goal isn’t just getting started right away though instead want something else entirely consider joining forces alongside other passionate individuals working hard toward achieving similar goals… Afterall collaboration makes life easier doesn't matter whether talking shop over lunchtime conversations online forums dedicated solely helping people solve complex issues faced every single day regardless industry sector involved
등등 다른 것들에 대해서도 물어봤는데 잘 답변하는 것을 확인할 수 있었음
-> 모델을 size도 작고, 성능도 좋으므로 이 모델을 fine-tuning 할것으로 결정
학습에 필요한 data set 직접 구축
사실 여기서 부터가 진짜 복병이었다. 구글링과 gpt한테 물어봐도 이런 프로젝트를 하는 사람은 많지 않아 보였다. 사실 이미 비슷한 연구를 하는 사람이 적으면, 실험이 좋지 않을 수 있어 선행 연구가 필수적이라고 생각했는데 생각한 방법론을 구축할 수 있을까 가장 고민을 많이 한것 같다.
프로젝트를 진행하기 전, 먼저 LLM에 대한 기초 조사가 필요할 것 같아. 따로 LLM을 공부해봤다. 기본 LLM에 넣는 데이터 셋은 질문 - 답변쌍의 구조를 갖는 데이터를 넣는 것 같았다.
하지만 새로운 데이터에 대한 데이터의 특성과 이것을 분석하기에는 이 데이터만을 갖고는 부족하다고 느겼다.
그러던 와중 이미지와 text를 동시에 활용하는 multi modal 방법론을 알게 되었다.
가장 큰 핵심 방법론은 csv 파일 , jpg로 구성된 데이터를 통합 JSON 파일로 구성한 후 고유키로 식별이 가능하도록 만든 후 학습을 진행하는 방식이었다. 나는 여기서 idea를 얻고 이것을 우리가 구축하는 학습 데이터에 적용 시켜보았다.
- 필요 데이터 셋?
1. 원본데이터.CSV
2. 원본 데이터에 대한 설명이 담긴 Meta data
3. 각 원본 데이터에 대한 상세 설명을 알려줄 질문 - 답변쌍 csv 파일
* 원본 데이터 csv 파일 외에는 나머지 데이터 파일은 구하기 힘들어 직접 만들었다.
방법론
1. 파일이 깨지지 않게 폴더 내 excel python에서 업로드 후 csv파일로 변환과 동시에 data frame으로 업로드
import os
import pandas as pd
#EXCEL 파일을 CSV 파일로 변경후 파일이름과 같게 dataframe으로 자동화 업로드
# 1. Excel 파일들이 있는 폴더 경로 설정
folder_path = 'data set 구축' # Excel 파일이 있는 폴더의 경로로 변경
# 2. 폴더 내 모든 Excel 파일 찾기
excel_files = [f for f in os.listdir(folder_path) if f.endswith('.xlsx') or f.endswith('.xls')]
# 3. 각 Excel 파일을 CSV로 변환하고, CSV 파일을 데이터프레임으로 로드하여 변수에 할당
for excel_file in excel_files:
# Excel 파일 경로
excel_file_path = os.path.join(folder_path, excel_file)
# Excel 파일을 pandas DataFrame으로 읽기
df = pd.read_excel(excel_file_path)
# 파일 이름에서 확장자를 제거하여 데이터프레임 변수 이름으로 사용
df_name = excel_file.replace('.xlsx', '').replace('.xls', '')
# CSV로 저장 (데이터프레임을 저장하는 대신 바로 로드할 수도 있습니다)
csv_file_path = os.path.join(folder_path, df_name + '.csv')
df.to_csv(csv_file_path, index=False)
# 데이터프레임을 변수로 할당 (동적으로 변수 이름을 할당)
globals()[df_name] = df # 'df_name' 변수를 데이터프레임으로 할당
# 출력 (변환된 데이터프레임 확인)
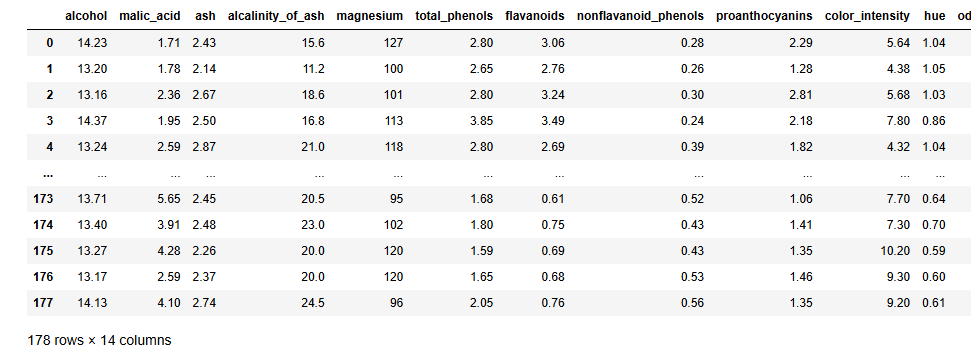
print(f'{df_name} DataFrame has been created with shape {df.shape}')wine_QA DataFrame has been created with shape (20, 2)
titanic_QA DataFrame has been created with shape (20, 2)
wine_dataset DataFrame has been created with shape (178, 14)
titanic_dataset DataFrame has been created with shape (1309, 14)
iris_QA DataFrame has been created with shape (17, 2)
iris_dataset DataFrame has been created with shape (150, 5)
boston_housing_dataset DataFrame has been created with shape (506, 14)
boston_housing_QA DataFrame has been created with shape (20, 2)
2. 데이터 프레임 확인
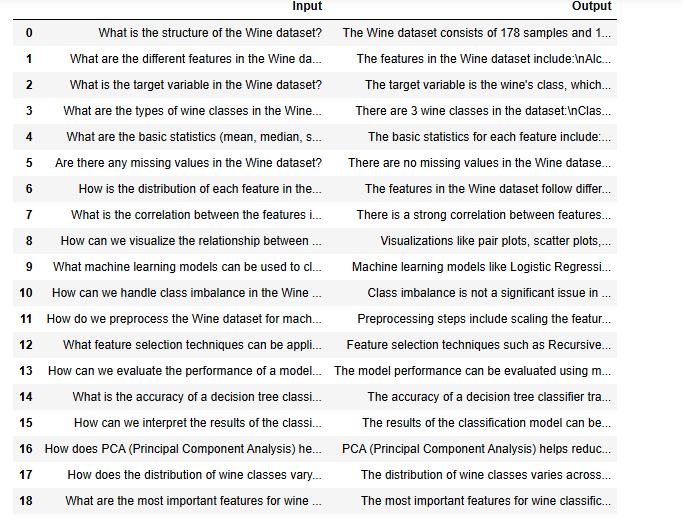
# 만든 원본 csv 파일과 질문 - 답변쌍 csv 파일 예시

display(wine_dataset)
display(wine_QA)
'딥러닝' 카테고리의 다른 글
| Titans: Learning to Memorize at Test Time (0) | 2025.04.02 |
|---|---|
| 이미지를 확률 분포로 생각하기 (Vae: Variational autoencoder) (2) | 2024.12.26 |
| FLEX .. 딥러닝 독파 시작 (2) | 2023.12.16 |
| Autoencoder (0) | 2023.08.05 |
| CNN(Convolutional Neural Network) (1) | 2023.07.31 |